Announcement

Collapse
No announcement yet.

The fab work on Cobra Money Pit

Collapse
X
 
  • Filter
  • Time
  • Show
Clear All
new posts

  • The fab work on Cobra Money Pit

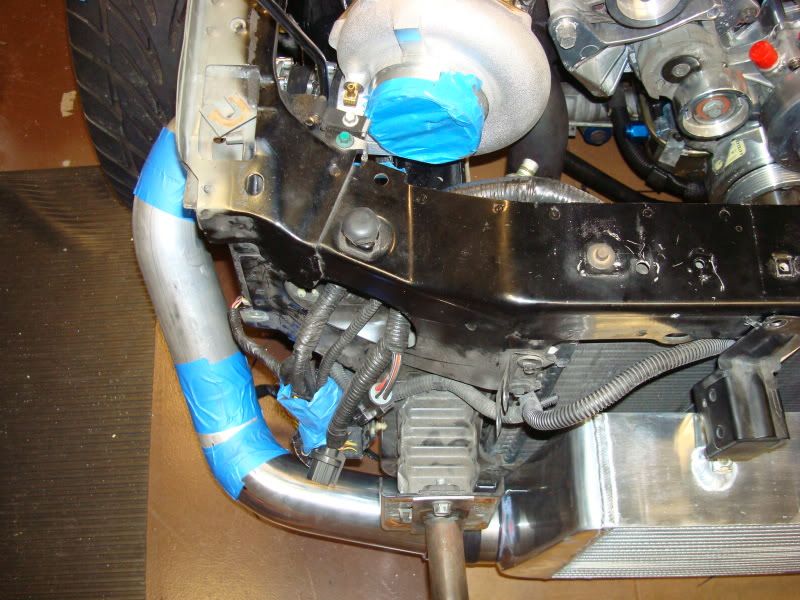
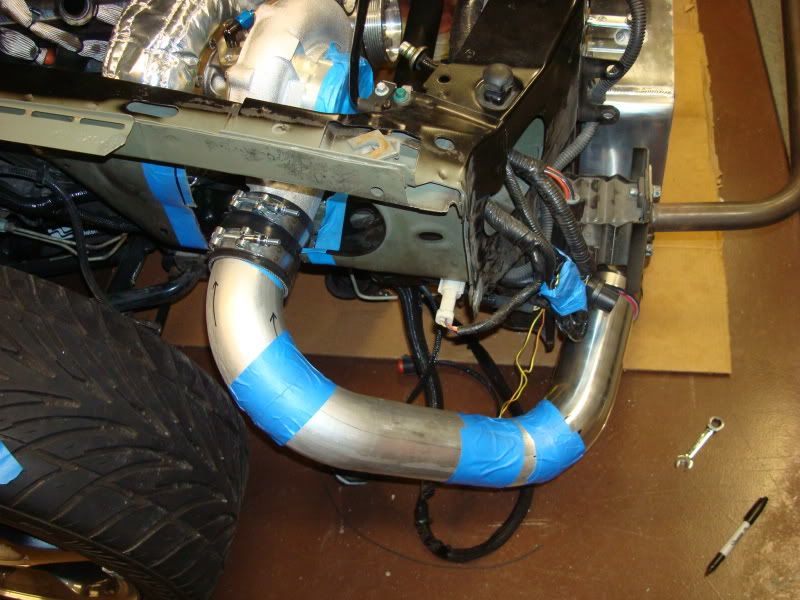
    Here is a little bit of the fab work I have had done just to make this car come together. As we all know nothing ever fits when you start mixing brands and parts not desinged together around.

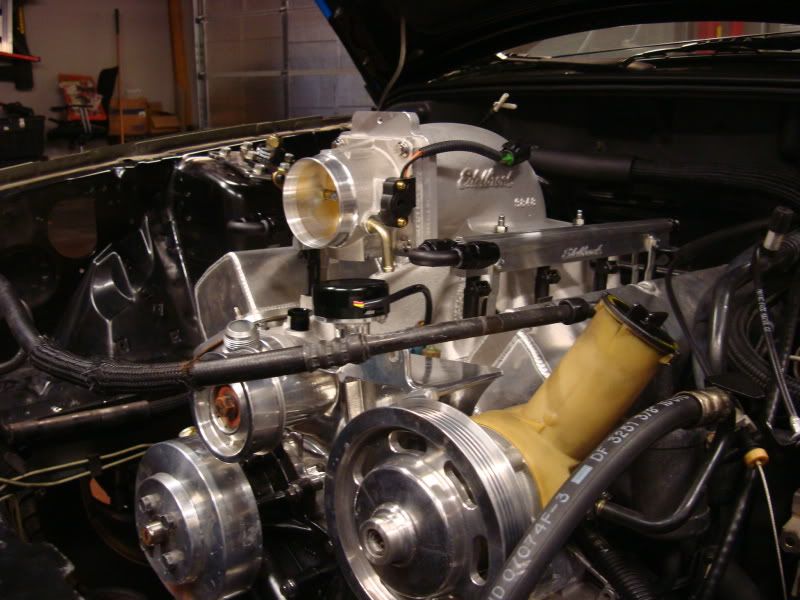
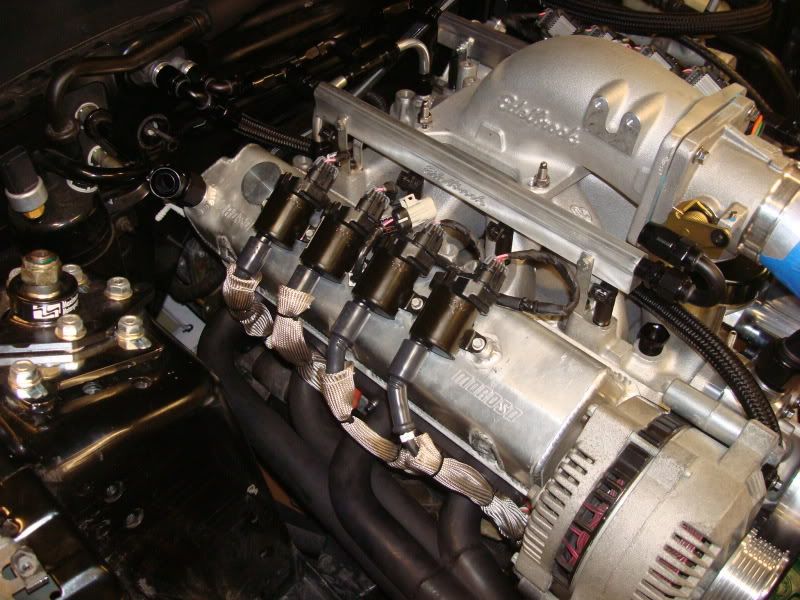
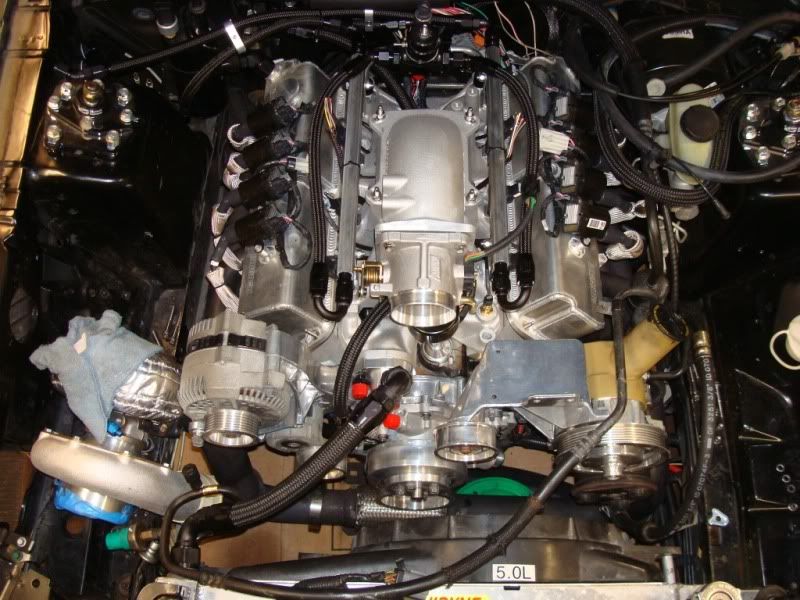
    Here is my 1995 Cobra with a full MM suspension, Dart 348ci 4.125" motor, AFR185 heads, Ed Curtis grind, Viper spec'd T56, Precission 76mm turbo and a BG Customs kit, full AEM ECM and EPM (coil on plugs), and the list goes on.

    I will post up some pics and explain why I went the route I did. The main goal for the car was to kepe the stock hood and outward appearance. So a lot of work went into that point alone.

    Photobucket is slow so I will start here:

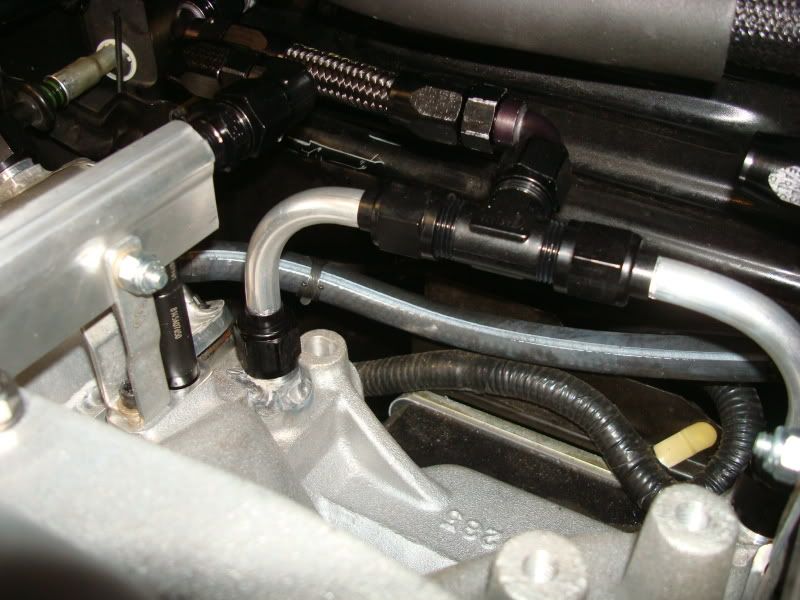
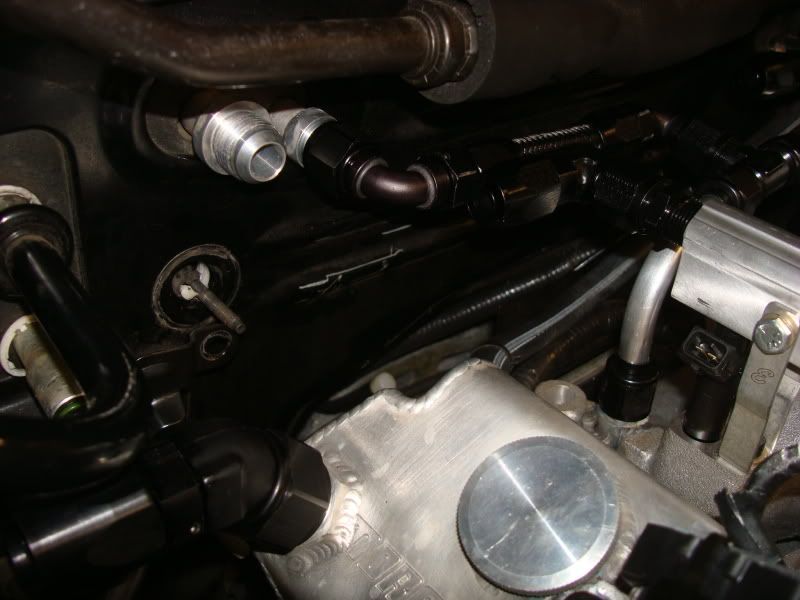
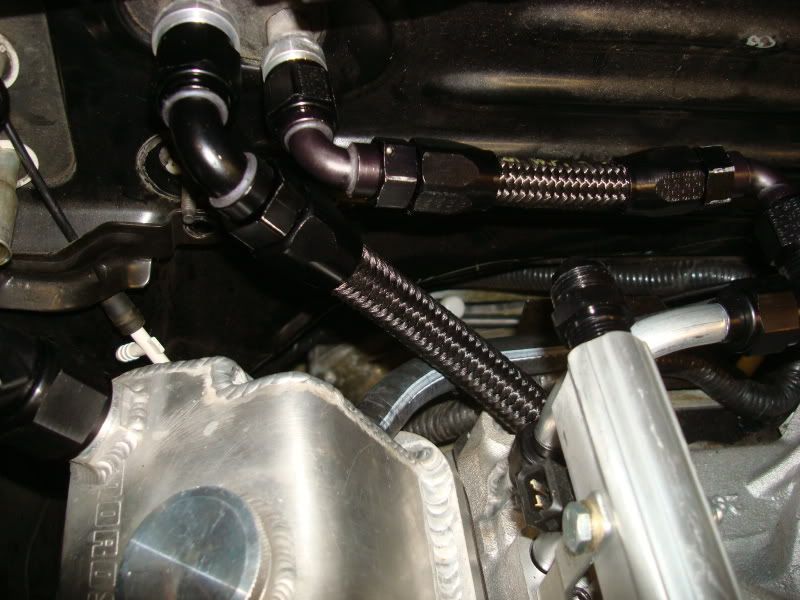
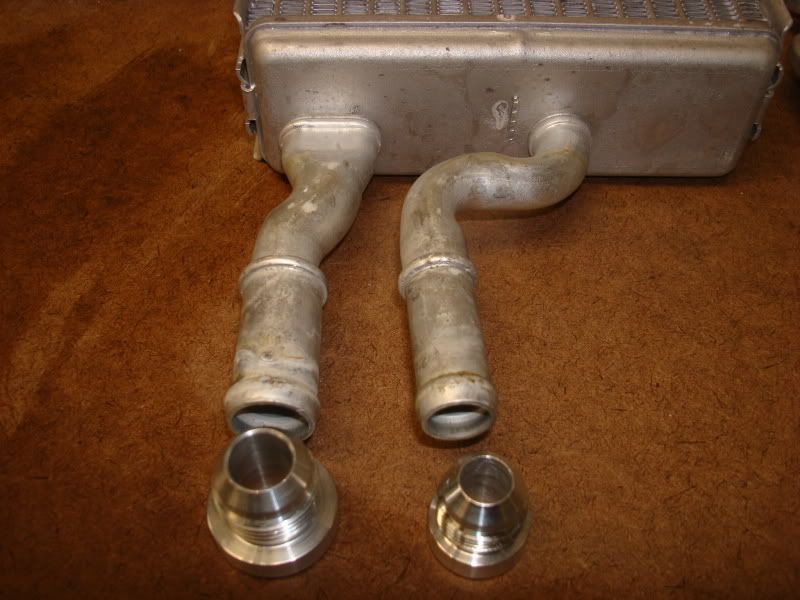
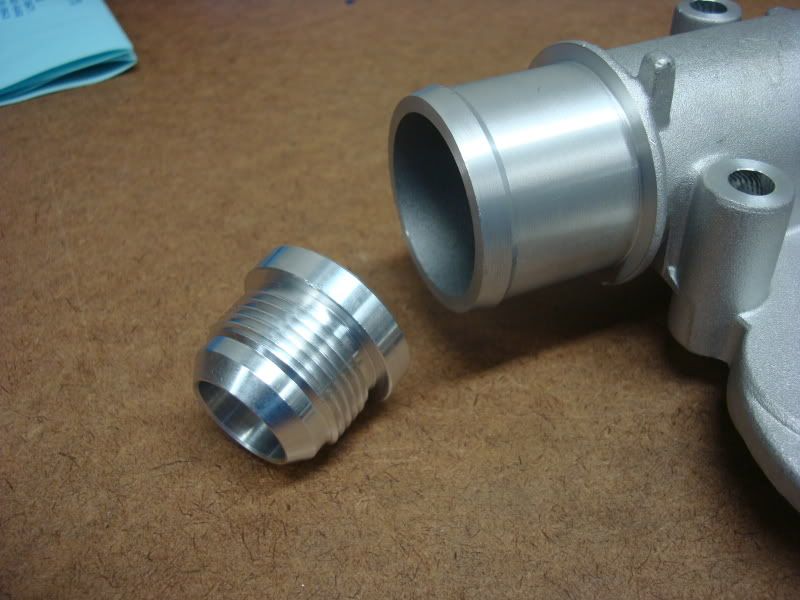
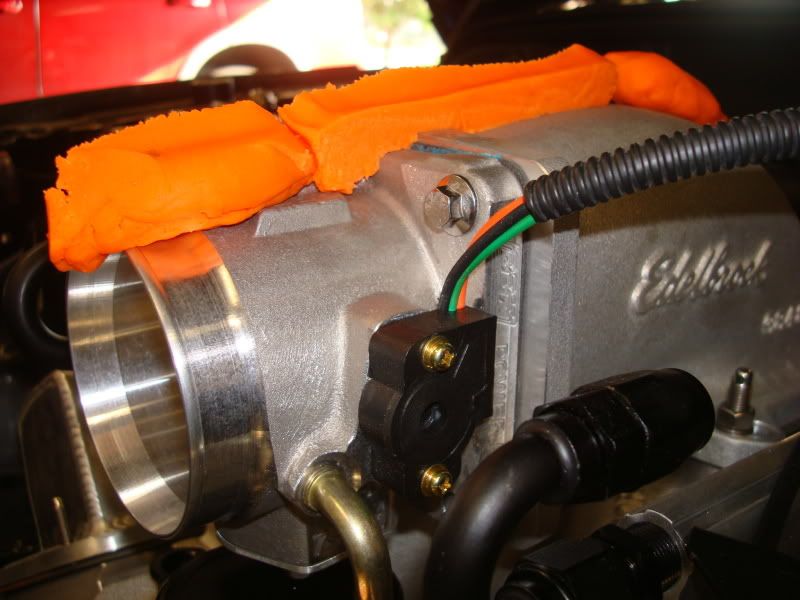
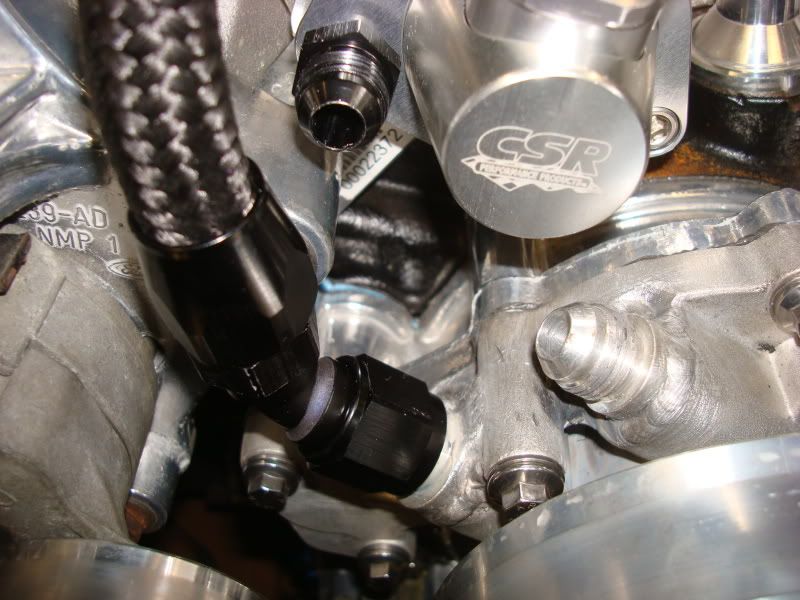
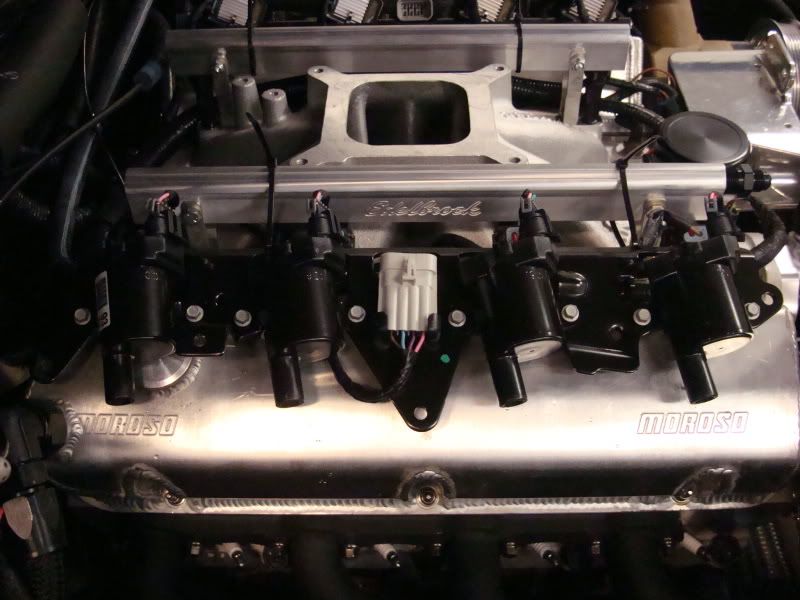
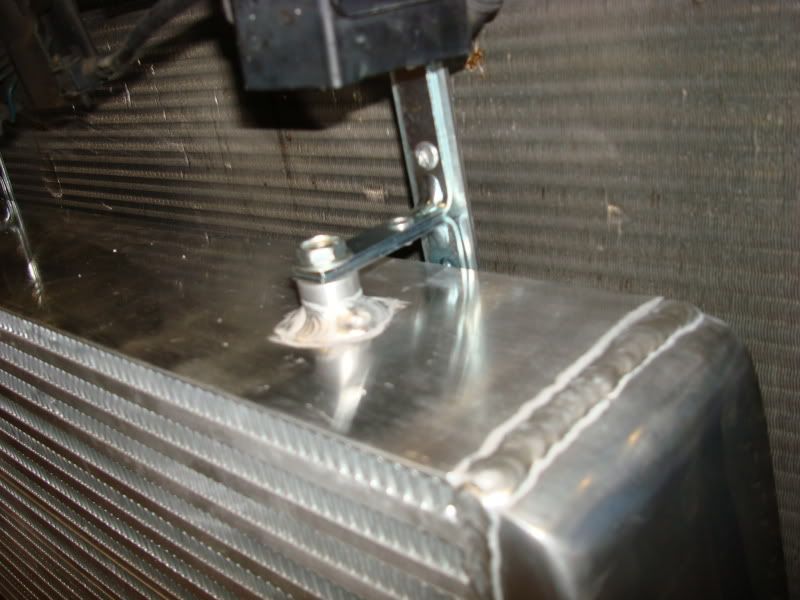
    Edelbrock Super Victor manifold - no rear water jacket and I wanted to feed heater core from the back of the block. So result was, weld (2) -8an bungs to the manifold bosses and drill straight through. I used 1/2" fuel line with -8 tube nuts and sleeves to build the crossover and a T in the middle to feed the heater core off of. Oh no hose clamps allowed on the car. All -an fittings only.


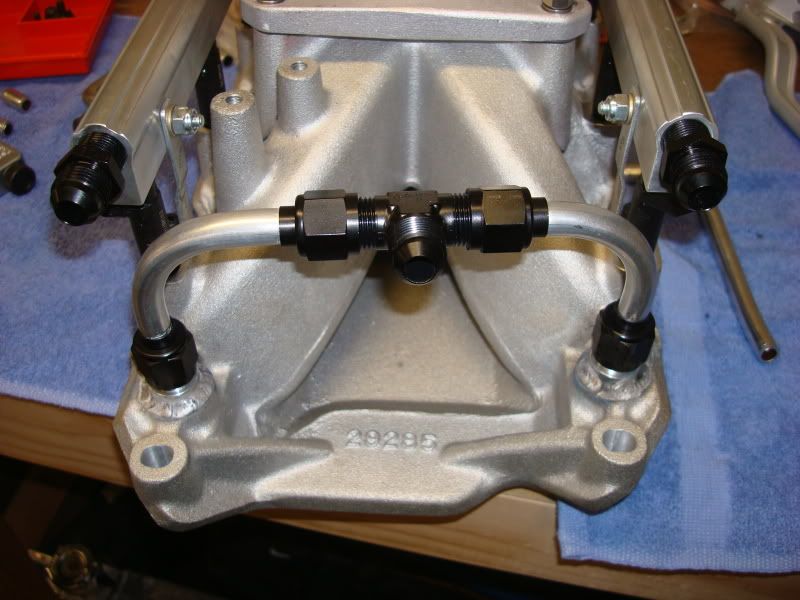
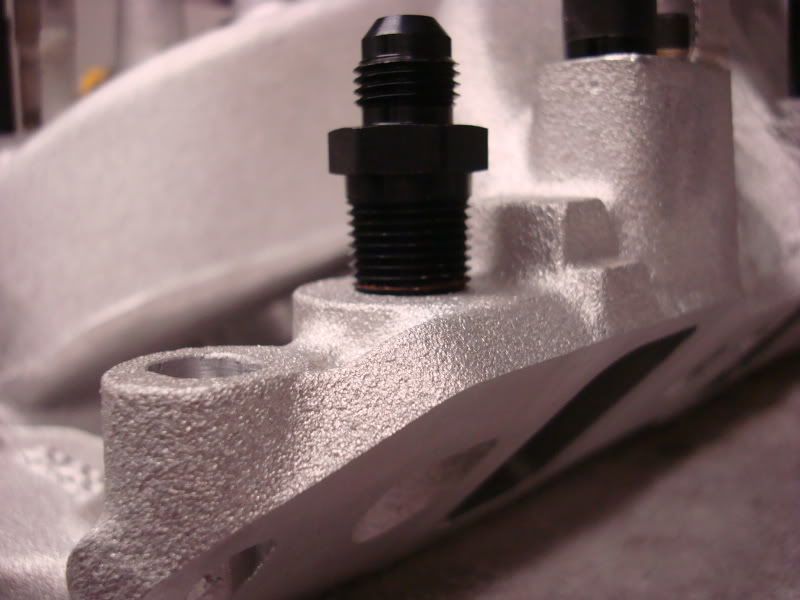
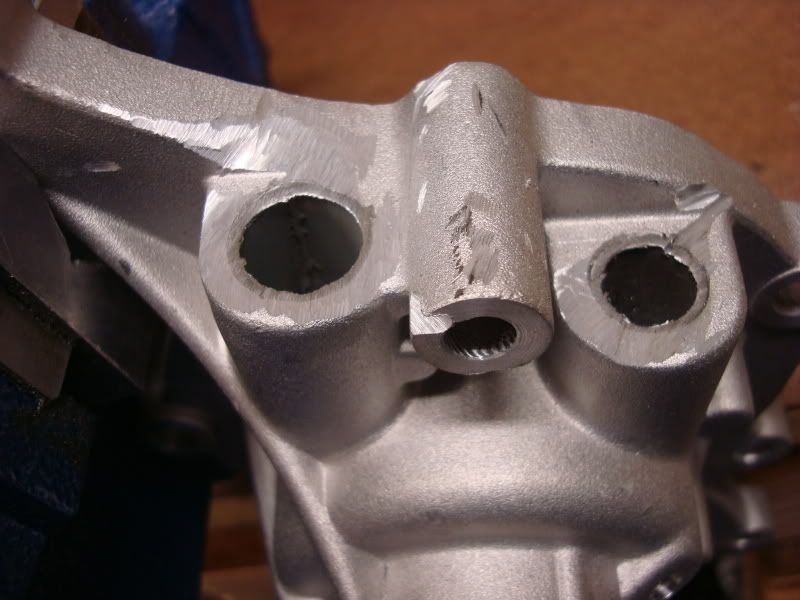
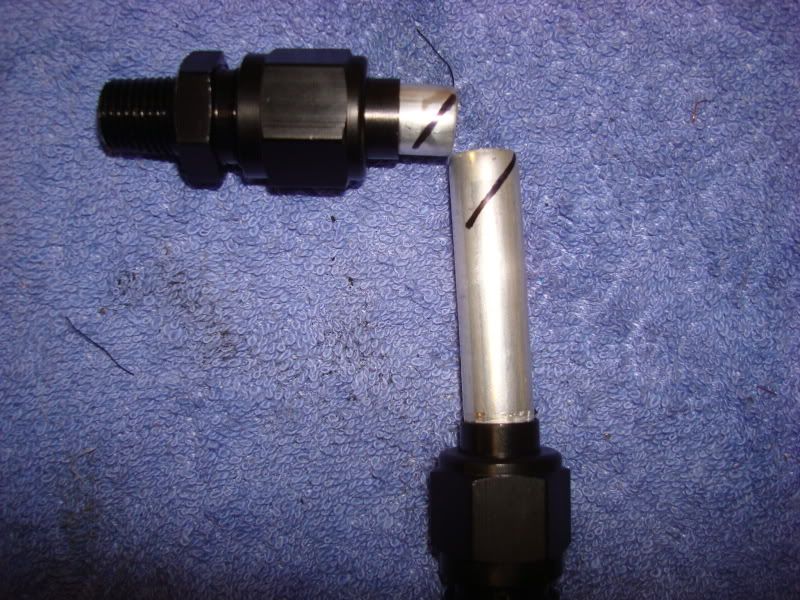
    A dry run when I thought I was gonna tap that bung. Sure glad I came to my senses and welded a bung to it.


    Last edited by KBScobravert; 11-18-2010, 12:09 PM.
    Fuck you. We're going to Costco.

  • #2
    wow, looks good
    Big Rooster Racing
    1985 Mustang GT

    Comment


    • #3
      The whole dash had to come out to get this little bugger in and out. It was worth it though, I was able to wire the dash for gauges while it was strapped down to a tool cart. Talk about the easiest gauges I have ever installed. Anyway. The heater core.


      Since I was using -an stuff and no hose clamps I had to swap out the steel pipes on the water pump also. New water pump from Autozone and few fittings later.

      -8an and a -10an


      Off with the steel pipes. I tried to pull they and I tried to split them. End result was a cut off wheel, a grinder and Dremel


      -16an for the record I used the summit brand cheap weld bungs and they work great. The -16 literally slipped in for a flush fit.
      Fuck you. We're going to Costco.

      Comment


      • #4
        the cuts to the pump would have been better but I had a few cold ones in me and decided it was the right time to operated cutting tools. Wife not pleased, friends laughed with first aid kit handy.
        Fuck you. We're going to Costco.

        Comment


        • #5
          I posted some time back about needing to mill the manifold base. Here is why.

          Since the coils are on the valve covers I couldn't run the factory style t/b inlet and retain the factory hood. I went with the Super Victor EFI and a front mount T/B instead.


          Test clearance with playdough....results 0 clearance. lol


          Grind the ear off and try again.
          (looking for pic) but still a no go.

          Machine the manifold down .3750" at the base and we have a fit.


          It puts the EGR port (unused anyway) close to the EPM but there is still room.

          I may have the EGR ports welded to eliminate the plate. One less thing to go wrong.
          Fuck you. We're going to Costco.

          Comment


          • #6
            Sorry for jumping around.

            Here is the pic of the water pump on the motor in relation to the t/stat housing (-8an fitting also). The -10an you see here runs through the manifold and to the heater core.


            Here is my first attempt to build a 90* pipe to bridge the gap. It did not work. I need to go back and try again. It is such a tight spot, only 2" up and 1" over. I think the next version with nail it though.
            Fuck you. We're going to Costco.

            Comment


            • #7
              Coils attached to small threaded bungs welded to the valve covers. ooops wrong pic, coils ziptied for placement lol
              As you see in the last pic we actually did away with the brackets.


              Plug wires made with plenty of materials left to make more


              It is gonna be a tight squeeze around the dp and I may have to move the coils inward.
              Last edited by KBScobravert; 11-18-2010, 12:17 PM.
              Fuck you. We're going to Costco.

              Comment


              • #8
                Wow, the difference w/ and w/o those brackets is literally night and day! You may very well be on your way to THE cleanest looking Ford engine bay ever., Nice!
                Originally posted by Taya Kyle, American Gun
                There comes a time when honest debate, serious diplomatic efforts, and logical arguments have been exhausted and only men and women willing to take up arms against evil will suffice to save the freedom of a nation or continent.

                Comment


                • #9
                  Looks awesome.

                  Comment


                  • #10
                    SEXY! Is this going to be a DD (type) car with A/C??
                    -Dustin
                    '94 Cobra
                    Coast High 408, AFR 205s,
                    1-3/4" BBK LTs, Tremec TKO,
                    ZA0 Tweecer Self Tune

                    09 F250 KR
                    10" lift, 38s

                    Comment


                    • #11
                      Gotta respect the fab work, but why invest that much effort in a VatoZone water pump? I've had water pumps from them last me less than 20 miles.

                      Comment


                      • #12
                        Originally posted by TX_92_Notch View Post
                        Gotta respect the fab work, but why invest that much effort in a VatoZone water pump? I've had water pumps from them last me less than 20 miles.
                        You have a point….then again if this car sees 1000 miles a year I will be surprised. It has only seen a thousand in the 3 years I have owned it. I also only have about $50 and my time in the mods to the pump though and a spare with the -16 already welded in for back up.

                        Originally posted by SVTCobra50 View Post
                        SEXY! Is this going to be a DD (type) car with A/C??
                        Thanks, not so much daily driver but fair weather car with A/C? Yes, the A/C stays unless it wont work with everything else and I can not find a work around. The A/C is a must to keep the wife happy, it was her only requirement.

                        Originally posted by Darren M View Post
                        Wow, the difference w/ and w/o those brackets is literally night and day! You may very well be on your way to THE cleanest looking Ford engine bay ever., Nice!
                        Thanks. I doubt it will be the cleanest. It would require some hole filling and a repaint. Don’t count that out either. Lol

                        And for the record the zip ties on the plug wire shields are temporary until I put stainless wire on them to hold them tight.

                        Originally posted by 90GT50 View Post
                        Looks awesome.
                        Thanks, it is a work in progress


                        Here is a pulled back pic of the bay


                        since this pic I have clocked the turbo to discharge into the fender well and I have built most if not all the cold side and I should have it welded up my next trip home in December.
                        Fuck you. We're going to Costco.

                        Comment


                        • #13
                          Cold side being mocked up, I wasted a lot of good material due to inexperience


                          Intercooler is mounted


                          I made the brakets out of of some angle supports and flat bar riveted together. It is as solid as if I welded it.
                          Fuck you. We're going to Costco.

                          Comment


                          • #14
                            Here is the charge pipe from the cooler to the front mount t/b


                            I hope I got the pipes tight enough under the tape for them to be tig welded witout having to recut.
                            Fuck you. We're going to Costco.

                            Comment


                            • #15
                              Here is the cold side snaking through the engine bay. I tried to make the cooler to t/b with as few couplers and managed to do it with only one but it is pretty close to the flex joint on the crossover pipe.


                              Fuck you. We're going to Costco.

                              Comment

                              Working...
                              X