-
For the record though, it generally looks good. I did a fairly long retaining wall about 4' high once. The french drain worked okay, but any extra drainage you can provide does help. After awhile, I noticed it seeping through the wall anyway. -
I know it'll be difficult, but a wide flat piece of galvanized steel should be enough to provide the support needed and not crush the pipe. Problem is getting it installed will require disassembly of that area. Probably could glue it and the surrounding area too to firm it up.Originally posted by SEB View PostLeave a comment:
-
Ratt def gonna take your advice. You & 2 other Contractors highly suggested installing 1inch Weep holes every 4 to 6 feet & every 2 feet at the highest point on the corner considering it being the lowest point of the whole property. Almost 60% of the rain drains out on this corner with the rain that hits the house & then rolls off the roof & combined with fence posts ( ALSO FENCE WAS INSTALLED 2 years ago.Originally posted by Ratt View Post
Thus my thread & any suggestions to help relieve the water from this corner when it rains hard in SpringLeave a comment:
-
Weep holes red to be every 4-6 feet on the long side anywhere it's over two feet tall, and on the tall side it needs to be every 2-4 feet (probably closer to 2). Looks great otherwise, good work man.Leave a comment:
-
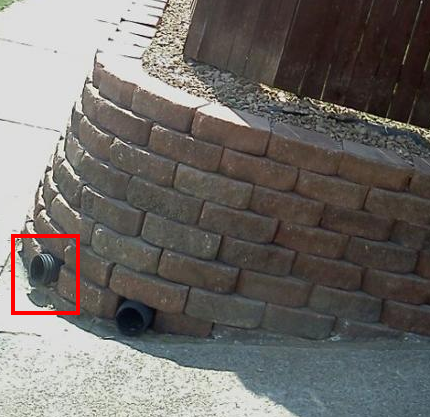
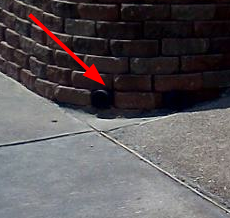
the first pic... the 3/4 inch corrugated pipe, looks as tho the block above it has no supportLeave a comment:
-
the pipe on the left is going to be a fail point. notice how the joint isnt supported above. it will cause a domino effect. at least that is the way the picture looksLeave a comment:
-
In this case it's all bout function before form, but IMO paying attention to those little things will keep your customers coming back. Sounds like you got it handled though.Originally posted by SEB View Post
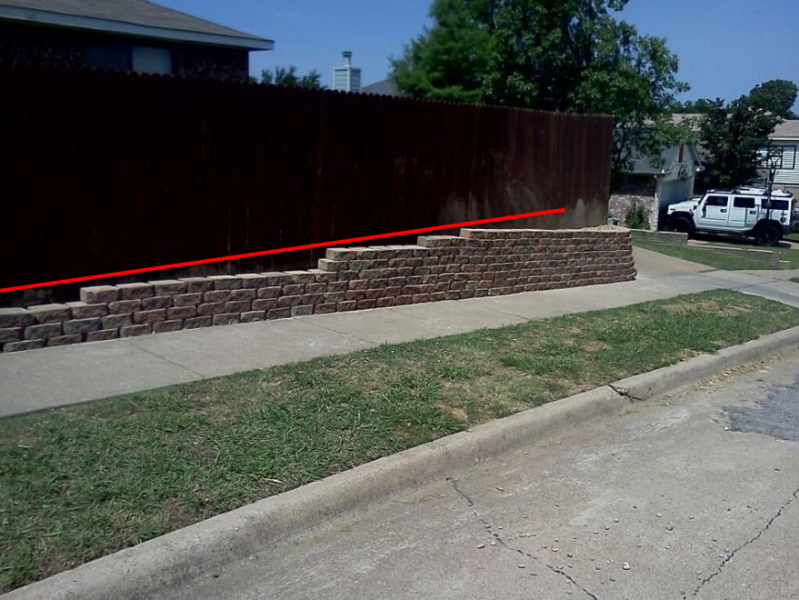
I wasn't thinking a solid wall but obviously that would look good. I was thinking if you were going to leave the ends of the layers sloped like they currently are that you could get maybe 10 or so more bricks and even out the ends so they slope more evenly.
That spot where you drop down two layers at the same time is what sticks out to me. Even that out and I think you improve the look significantly.
If I'm doing it I make the ends of each row touch this line.
Either way it looks good, I hope it drains like you need it to.Leave a comment:

Leave a comment: