Announcement

Collapse
No announcement yet.

Polishing your AR Trigger

Collapse
X
 
  • Filter
  • Time
  • Show
Clear All
new posts

  • Polishing your AR Trigger

    This was posted some time ago. I worked the trigger on my budget build, but I didn't take any pictures. MY RRA Lower Parts kit showed up Yesterday, so I figured I would polish it up and take some pictures along the way. I used a write up from this thread http://www.dfwmustangs.net/forums/sh...trigger+polish

    Originally posted by CJ View Post
    Basically you sand/polish the contact points which removes all the grit from the action (Which is what makes the trigger shitty). Polish the face of the trigger (which if you have the trigger out, it's the machined exposed steel at the very front) That is where the trigger engages the hammer, and that's one of two contain surfaces. You want to hold it perfectly flat on a piece of glass or mirror and use some 800 grit or 1000 grit and work it slowly back and forth until all the machine marks are off the face. Then you can move to a higher grit, or polish. When you polish the face make SURE you use a flat piece against the engagement face (the top portion) as to not round the face at the edge. How sharp that edge is is how clean the break is. On the hammer you'll see an indentation on the bottom, a very small shelf - that's where your trigger sits. you can fold some fine sandpaper up and make sure the crease is sharp, and then carefully work it back and forth to remove the machining marks. This is the other 50% of your contact service. Polishing this is more difficult, I usually flip the sandpaper over and put polish on it, then work it in.

    Lastly you can polish the contant points of the trigger/hammer - basically where they ride against the receiver on the pins. sand/polish the sides where they contact. If you get real fancy you can chamfer the sides so you reduce the surface area of contact, but only do this if they fit pretty snug. If they have side play in excess of 0.01" then don't.

    Lastly the most noticeable change you can make is to the hammer spring itself. This is tricky and takes some experience as I've found over the years that there any MANY different kinds of steel and tension used in various parts kits. Because of this I no longer do the trigger jobs unless I can feel the spring myself and judge if it's already too weak to reduce. The problem is some of the cheaper kits have much less tension on the hammer spring, if you cut or bend a leg you can cause the hammer to have too little pressure and you get light primer strikes on military ammo. Generally what you do is put a 30* bend in each of the trigger spring's legs, then cut 1 leg off the hammer spring - it will drop the trigger pull from 7-8lbs to 5lbs or so. Sometimes you can get it down to 4lbs. This combined with the polishing makes the trigger a hell of a lot better than factory.

    For advanced people you can change the engagement angle of the trigger face. If you notice the engagement face is 110*, not 90* like you would expect. That's positive engagement for safety reasons. If you make that a 90* angle it will remove most all of the creep from the trigger. Sounds really easy, right? No, the problem is most LPK triggers are only case hardened, not completely hardened. Once you make the angle change, you have to re-harden the trigger, and that's a complicated and time consuming process. If you're interest in doing that I can walk you through it.
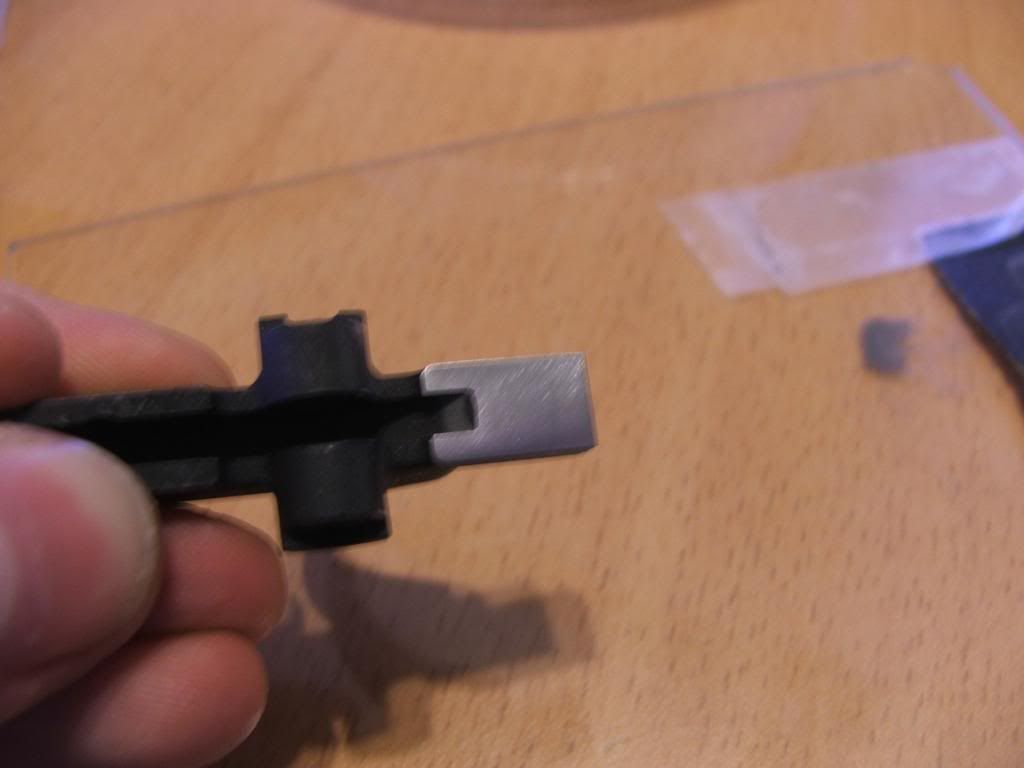
    I used 800, 1000, and 1500 grit wet/dry sand paper and a piece of plexiglass.


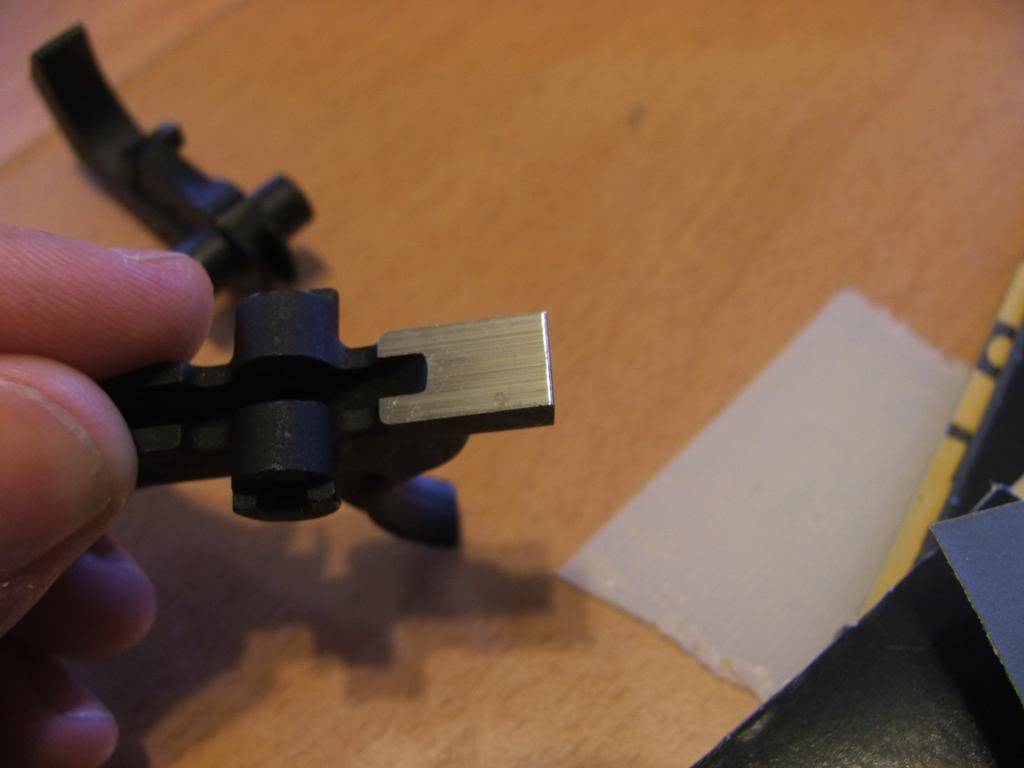
    Here you can see the marks left behind from machining the faces on the trigger


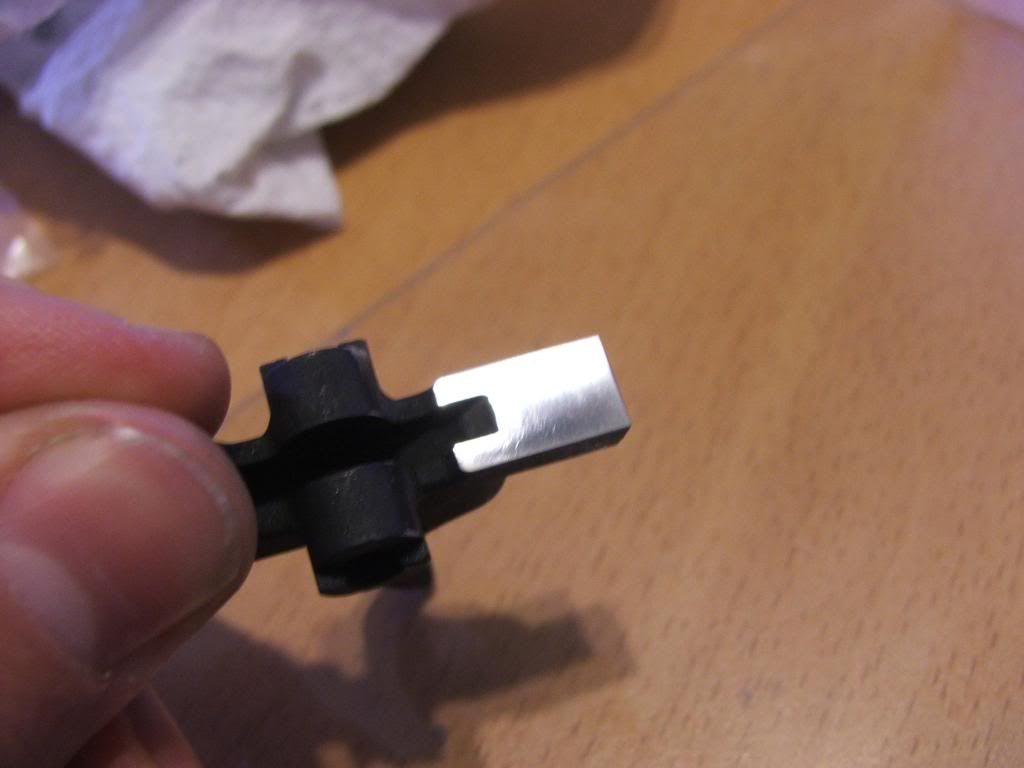
    I started with the 800 grit paper


    Then progressed to the 1000 and 1500


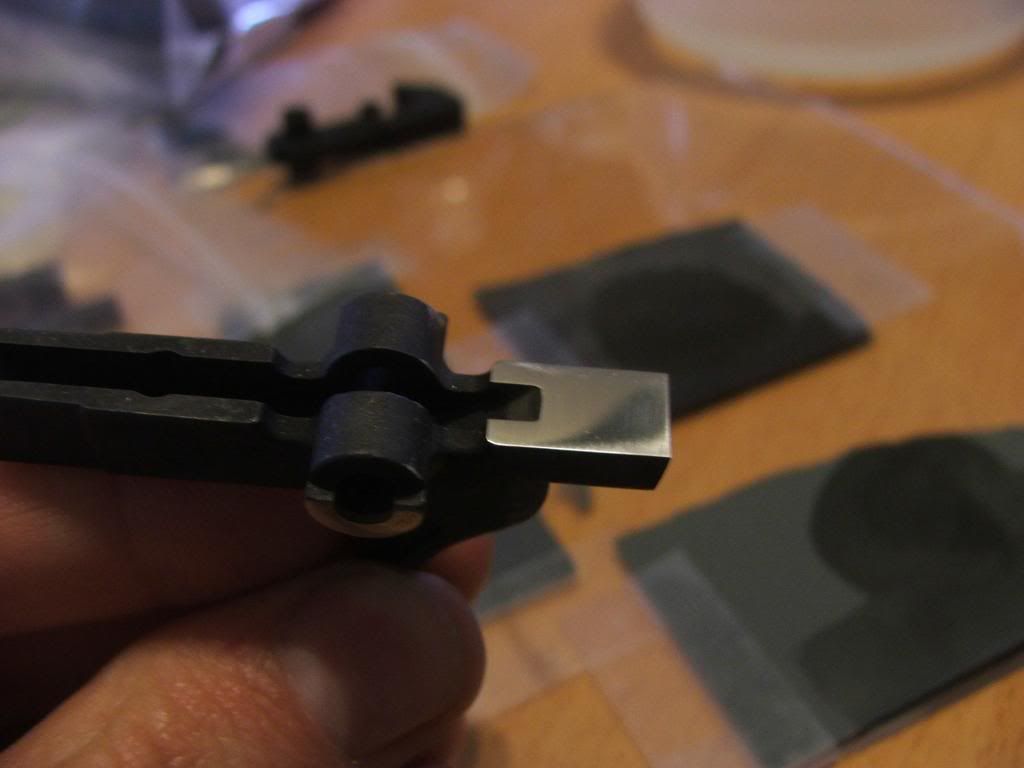
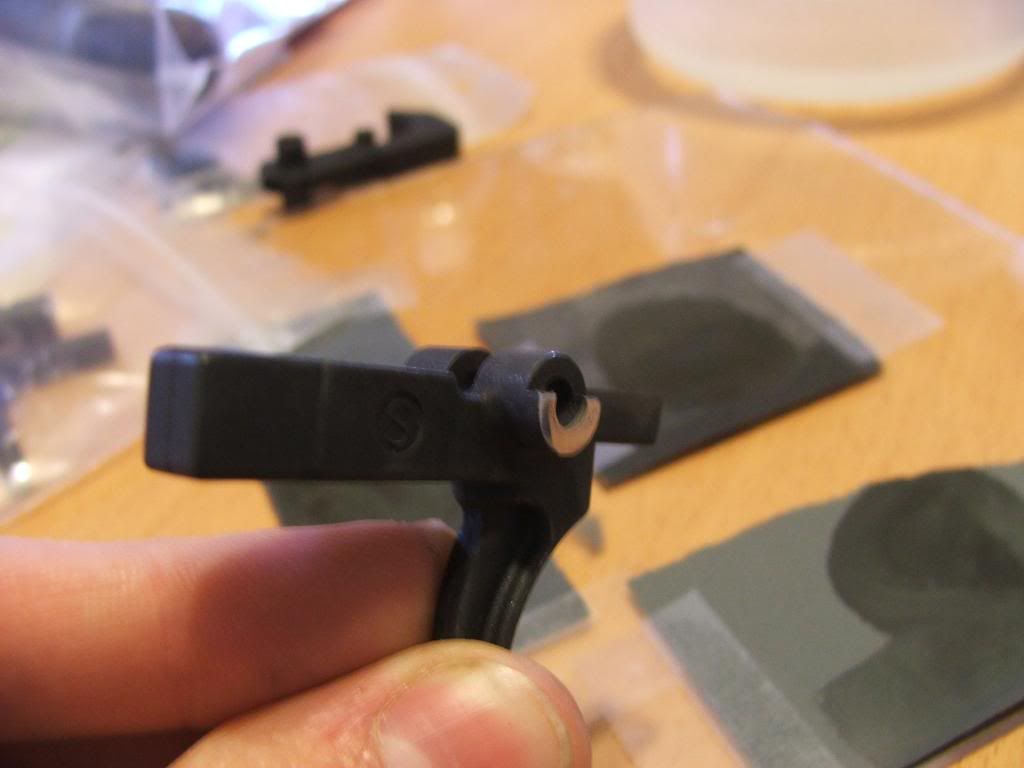
    I also cleaned up the sides of the trigger where it would be contacting the lower receiver


    I haven't worked the hammer yet, that is next on my to-do list. This only took about an hour.
    Originally posted by Leah
    Best balls I've had in my mouth in a while.

  • #2
    awesome. I will try this also.

    Comment


    • #3
      FYI the front of your trigger is the only part that makes contact, the top doesn't touch anything You place the glass on the top of the trigger to prevent the sharp edge on the top/front from chamfering. The face (front) of the trigger is your contact piece.
      "When the people find that they can vote themselves money, that will herald the end of the republic." -Benjamin Franklin
      "A democracy will continue to exist up until the time that voters discover that they can vote themselves generous gifts from the public treasury." -Alexander Fraser Tytler

      Comment


      • #4
        Originally posted by CJ View Post
        FYI the front of your trigger is the only part that makes contact, the top doesn't touch anything You place the glass on the top of the trigger to prevent the sharp edge on the top/front from chamfering. The face (front) of the trigger is your contact piece.
        I thought it took me longer this time around!
        I should have re-read your post! It has been several months since I did the trigger on my rifle

        Sent from my SAMSUNG-SGH-I727 using Tapatalk 2
        Originally posted by Leah
        Best balls I've had in my mouth in a while.

        Comment


        • #5
          Damn not being able to edit posts on my phone. I polished both the front and the top of the trigger

          Sent from my SAMSUNG-SGH-I727 using Tapatalk 2
          Originally posted by Leah
          Best balls I've had in my mouth in a while.

          Comment


          • #6
            Trying this tonight. Good thing I have a couple of extra LPK's in case I screw something up! Thanks for the tips!
            Originally posted by Taya Kyle, American Gun
            There comes a time when honest debate, serious diplomatic efforts, and logical arguments have been exhausted and only men and women willing to take up arms against evil will suffice to save the freedom of a nation or continent.

            Comment


            • #7
              Originally posted by Darren M View Post
              Trying this tonight. Good thing I have a couple of extra LPK's in case I screw something up! Thanks for the tips!
              It is super easy. I followed the same steps when I built my rifle. The only thing I didn't do was polish the sides of the trigger (contact surface with the lower) and it functions just fine! The trigger seemed much smoother than before

              Sent from my SAMSUNG-SGH-I727 using Tapatalk 2
              Originally posted by Leah
              Best balls I've had in my mouth in a while.

              Comment


              • #8
                Was pretty easy. My trigger had some pretty deep grooves and I got most of it out. I didn't want to be too aggressive. Put it all back together and followed the instructions in this link to shorten the trigger pull. Got the exact set screw I needed from Lowes and didn't even have to shorten the pistol grip bolt.
                Originally posted by Taya Kyle, American Gun
                There comes a time when honest debate, serious diplomatic efforts, and logical arguments have been exhausted and only men and women willing to take up arms against evil will suffice to save the freedom of a nation or continent.

                Comment


                • #9
                  Why not polish the side oh the hammer too?? I mean, I realize that has nothing to do with the feel, but wouldn't it provide a smoother hammer action? Or, is it not worth the effort?
                  Originally posted by Taya Kyle, American Gun
                  There comes a time when honest debate, serious diplomatic efforts, and logical arguments have been exhausted and only men and women willing to take up arms against evil will suffice to save the freedom of a nation or continent.

                  Comment


                  • #10
                    Originally posted by Darren M View Post
                    Why not polish the side oh the hammer too?? I mean, I realize that has nothing to do with the feel, but wouldn't it provide a smoother hammer action? Or, is it not worth the effort?
                    If I am already doing the trigger, I will polish the sides of the hammer and triggger and even the contact faces of the safety.
                    Fuck you. We're going to Costco.

                    Comment


                    • #11
                      Originally posted by Darren M View Post
                      Why not polish the side oh the hammer too?? I mean, I realize that has nothing to do with the feel, but wouldn't it provide a smoother hammer action? Or, is it not worth the effort?
                      I plan to do the hammer as well just haven't gotten around to it yet. I overworked myself a couple of days after I did the trigger and am just now getting back up to speed (7 months post op from back surgery). I picked up my poly lower todat so I will get this finished up this week along with a build/review of the New Frontier poly lower and issues that must be addressed when using a standard LPK.

                      Sent from my SAMSUNG-SGH-I727 using Tapatalk 2
                      Originally posted by Leah
                      Best balls I've had in my mouth in a while.

                      Comment


                      • #12
                        The surface on the safety that sevices the detent too? If so, how?!?
                        Originally posted by Taya Kyle, American Gun
                        There comes a time when honest debate, serious diplomatic efforts, and logical arguments have been exhausted and only men and women willing to take up arms against evil will suffice to save the freedom of a nation or continent.

                        Comment


                        • #13
                          this is also a budget trigger helper if you like it lighter

                          sigpic

                          Comment

                          Working...
                          X