-
Or forget all that crap, grab an Explorer aluminum driveshaft, have Automotive Driveline Supply in Hurst shorten it about an inch for $80, swap your T5/AOD/C4 slip yoke which takes a 1330 and hit the road. -
I know that one. Hold on. It's the one I used in the falcon.Originally posted by Z06killinsbf View Post
You have the 1.06" cup, right?
EDIT**
You don't have a T Code driveshft in there do you?
You should need the one listed above.
•1310 series
◦3.219 inches (3 7/32) wide across bearing caps
bearing caps are 1.062 inch (1 1/16) diameter
•1330 series
◦3.625 inches (3 5/8) wide across bearing caps
bearing caps are 1.062 inch (1 1/16) diameter
Like I said earlier, I have found a lot of mis-boxed, mis-labeled u-joits out there. Also be aware that sometimes you will find these u-joints with an extra set of cups. 1 1/16' and 1 1/8".
If all else fails, and this will probably too, cross a Spicer 5-101x which has the 1" cups and see if they fit the 5-134x.Last edited by homealone; 09-01-2015, 12:24 PM.Leave a comment:
-
I think my drive shaft is just fucked up, a 1310 is a 1/16th too big and I've tried 4 different brands.Leave a comment:
-
Double check the size on your driveshaft end but you should need a 1310 to 1330 conversion u_joint.Originally posted by Z06killinsbf View Post
Percision 353 (Oreilly)
Duralast 1-0134 Autozone
Double check the U-joint at the store. I find every other one to be mis-boxed.
I don't recomment the Autozone piece. It is not forged like the others.Last edited by homealone; 09-01-2015, 09:56 AM.Leave a comment:
-
What flange did you get? I have the Explorer 1330 flange but am having difficulty finding the correct adapter U joint.Originally posted by BLAKE View PostLeave a comment:
-
I might be doing this 8.8 later on as well. New spring perches are available for cheap, several aftermarket Jeep parts suppliers s sell them locally. Kevin has the part #'s some where.
Edit: Rugged Ridge part # 18267.02 has been used before.Leave a comment:
-
Got a spare short-side axle and the pinion flange yesterday. Should be all I need. Going to shorten it to 65-66 width.
Any insight on the shortening process is appreciated, as well as what you did for spring perches and anything else I'm not thinking of that might be important.
Thanks man!Leave a comment:
-
Thanks, but like everything else, this is an experiment. We'll see how it holds up long term.Originally posted by BLAKE View Post
Did you get the extra short side axle while you were there? Or are you going to run it 67-70 width?
Let me know if you need any guidence, I'd be happy to walk you through the modification process.Leave a comment:
-
Headliner looks great man!
Also, thanks for the Exploder rear end pics. Thanks to some friends and some time sweating at the junk yard, I've got my 8.8 sitting in the shop. We'll be doing the same stuff and I think we'll retain those traction bars too, which is so damn cool. These pics are helpful!Leave a comment:
-
Planning on it. It's the only thing not boxed in right now. lolOriginally posted by DennyLeave a comment:
-
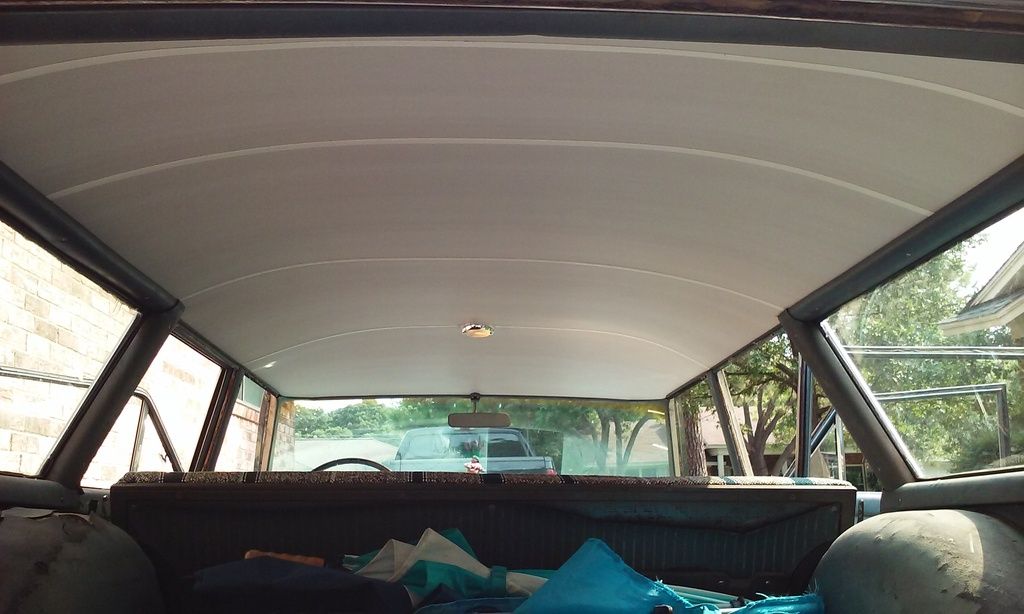
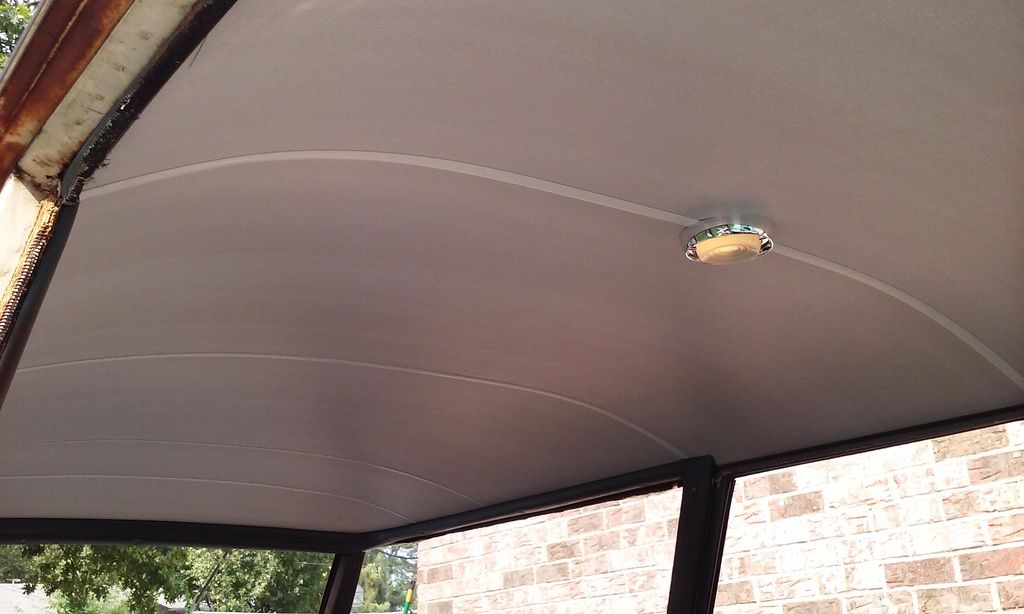
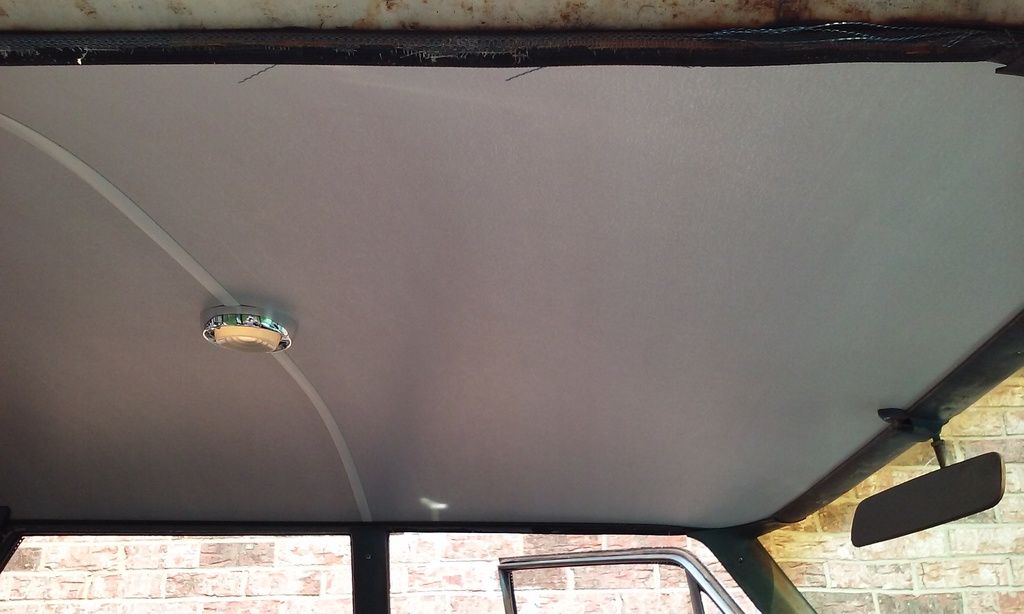
Today I checked one more thing off the "to-do" list. I've been driving this thing around for a year looking at the insulated inner roof skin. A headliner was planned but not a big priority.
So today I knocked one out. What a difference, I should have done it earlier.
A little background. The original headliner was a rigid perforated board. Not the typical material and not available anymore.
I needed something thin, flexible and budget minded. I used Thermo Ply Poly Structural Sheathing (The stuff you wrap your house with) and the division bars for waterproof wall panels.
I was on such a roll I never stopped to take progress pics so you will only get before and after pics.
So with some math, a table saw, a little figuring, lots of trimming, here is what I ended up with.
Here is where I started.
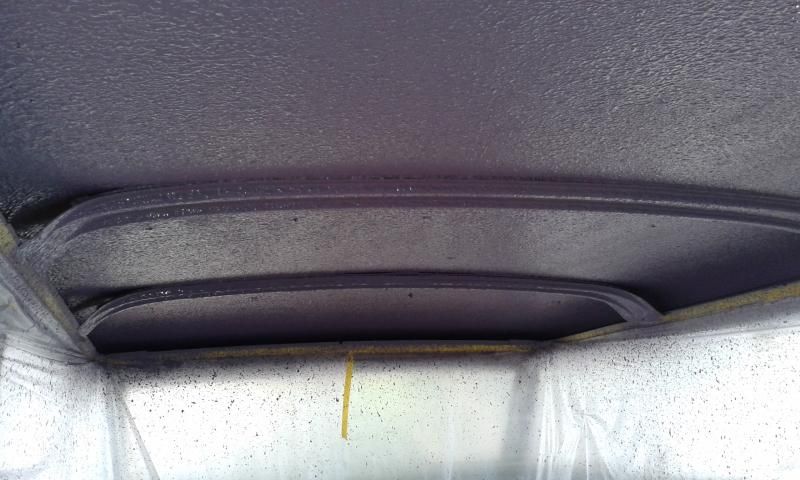
This is where the material should be.

And here are a few shots of the finished headliner.
Leave a comment:
Leave a comment: